In order to have your own 3D vehicle model in Vissim, there are several things to prepare before getting into it.
Overall, you need to do:
1. Download your own 3D vehicle model(*.DWF, *.SKP, *3DS)
2. Import your model to V3DM, which is installed together when you install vissim on your computer
3. Set Front/Rear axle and joint and export the model with .V3D extension format
4. Import your .V3D file into the VISSIM
5. Set 3D model distribution
6. Set Vehicle Types
7. Set Vehicle Classes(not necessary, but recommended)
8. Set the Vehicle Compositions
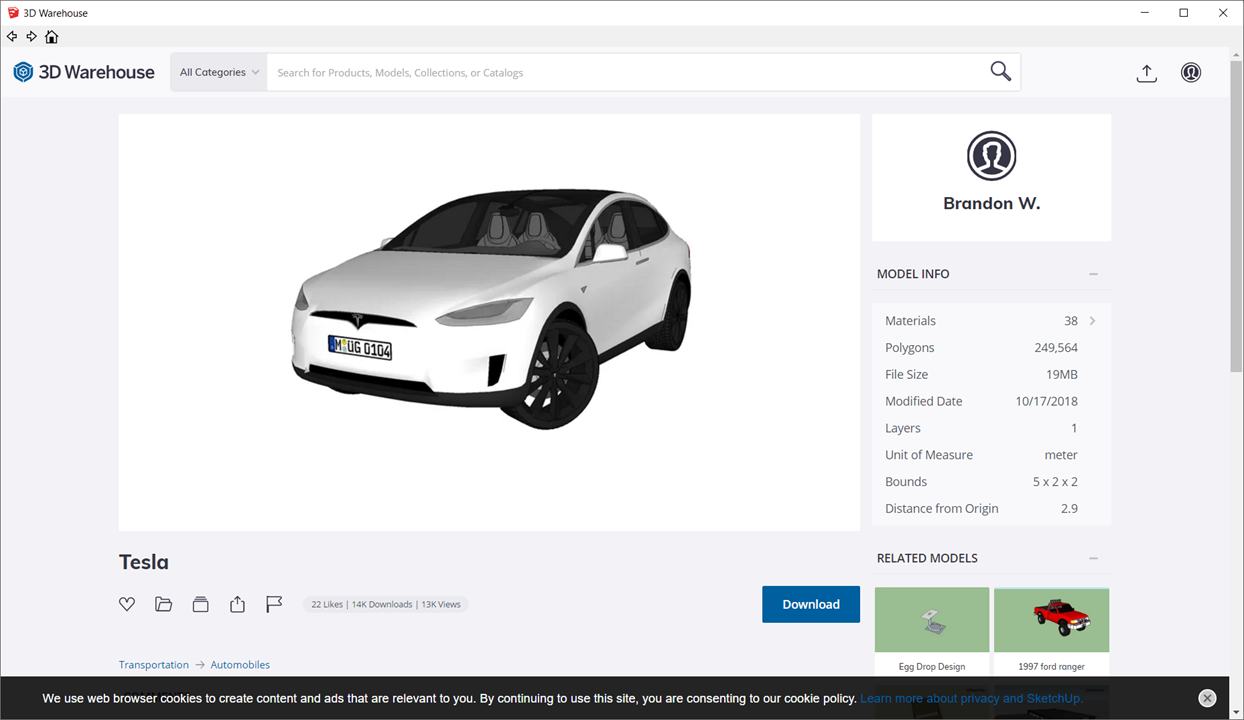
Step 1-1. Download your model
From the 3D warehouse in Sketchup or in this link(3dwarehouse.sketchup.com/?hl=en), find and download your favorite car model.
Step 1-2. Align the model
After opening your model in SketchUp, align the model to the x and y-axis.
Once it is done, save it with the lower version of SketchUp, for example, SketchUp 2013

Step 2-1 Import SketchUp file to V3DM
Create a new project.

Once you create your project, right-click on 'Base model' folder under 'Model State' and click 'Add' option.

After that, you might get the window as below.

Step 2-2 Setting Axle on the model
Click the 'Hammer' button and click the Vehicle option in the red circle.

In the vehicle properties, you need to set the four options(Front/Rear axles and Front/Rear joint)

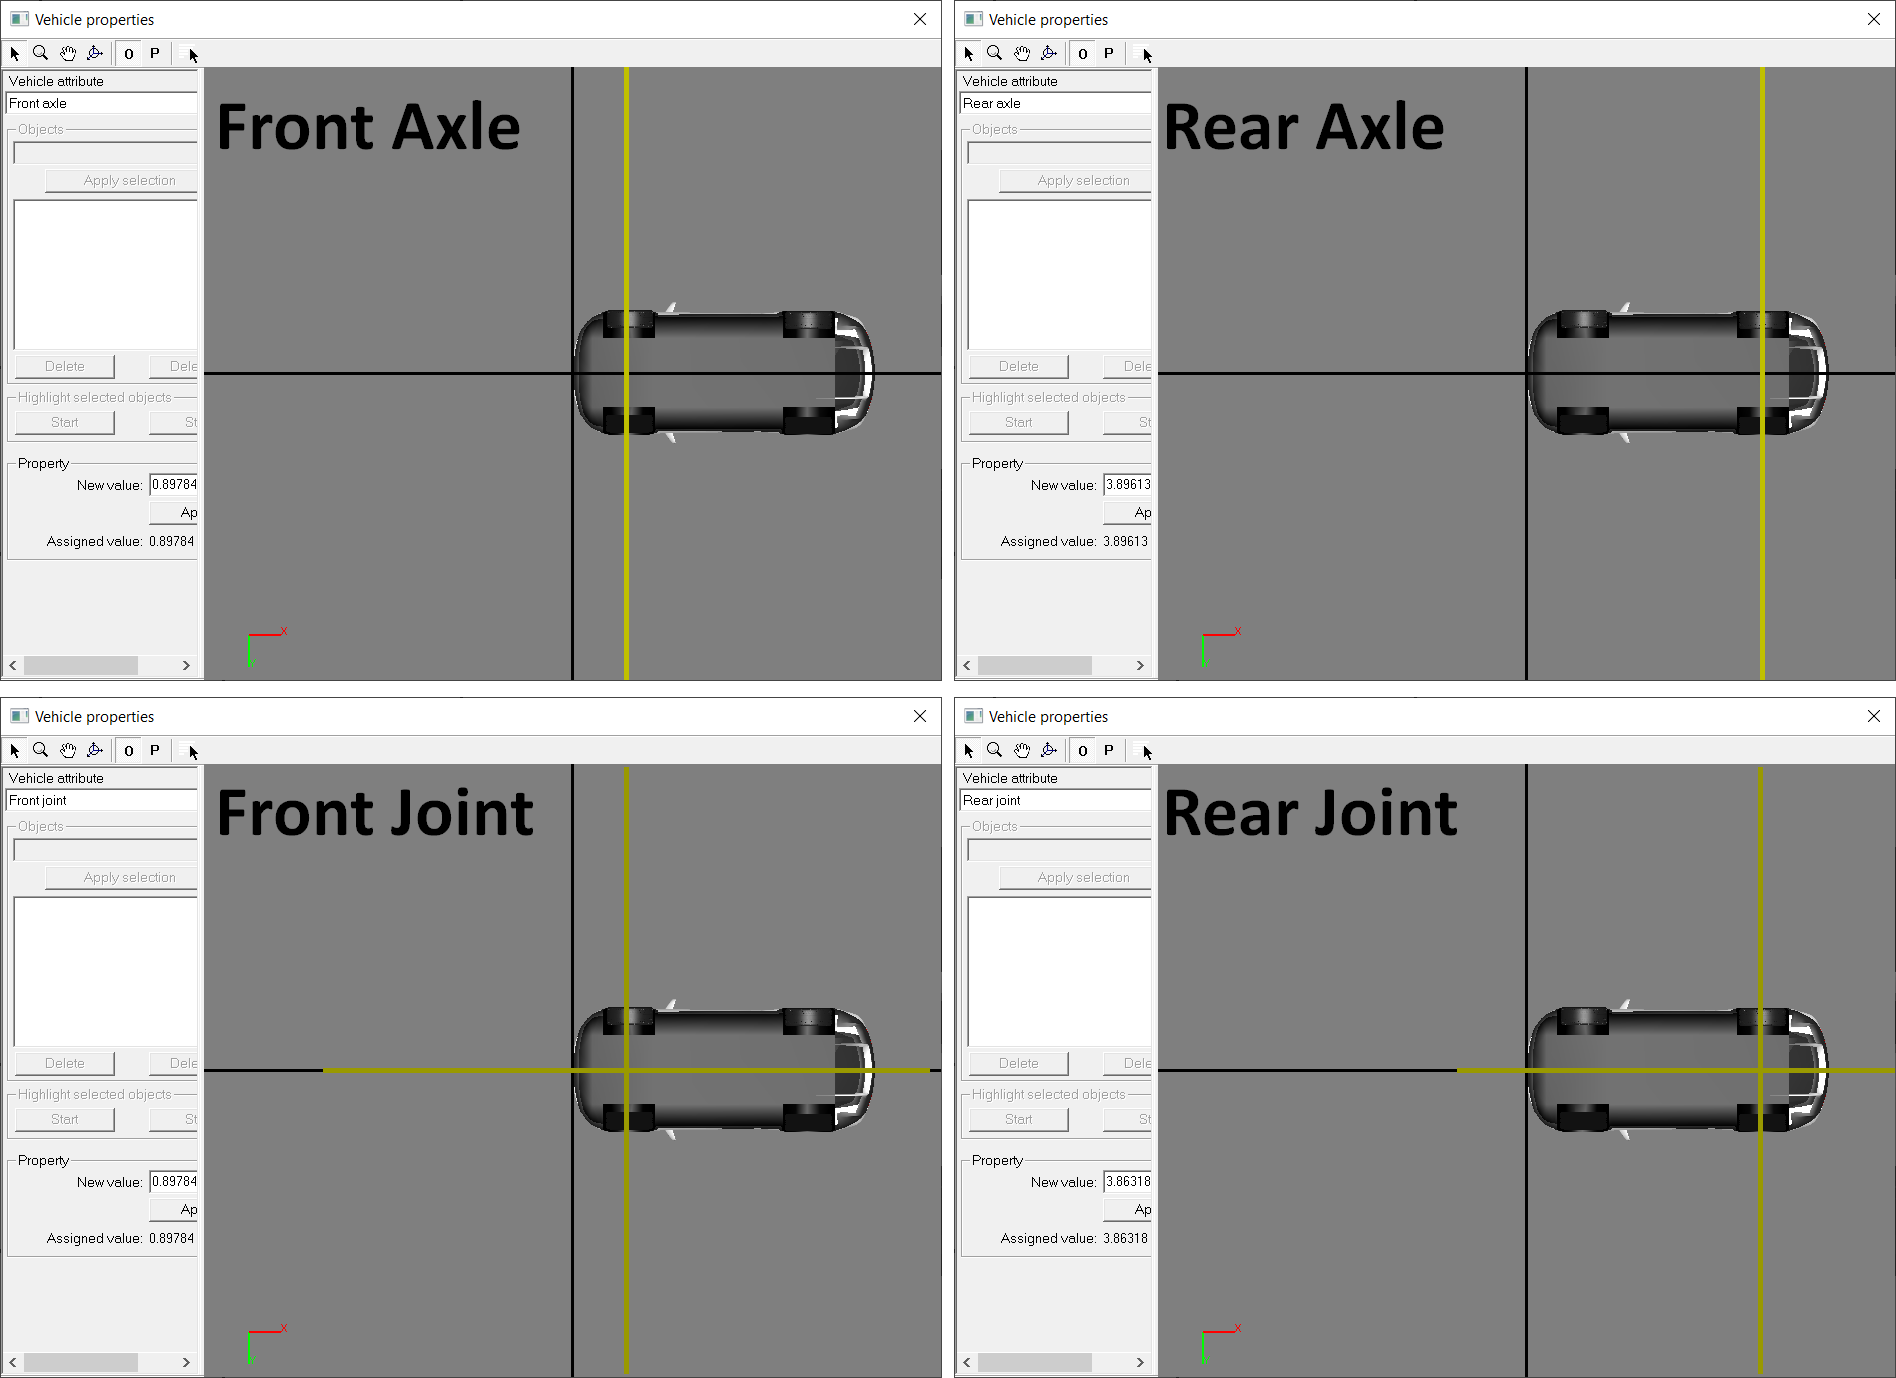
Step 2-3 Export the model

Step 3-1 Set 3D model in VISSIM
Go to "Base Data" -> "2D/3D Models"

Click the add button and import your vehicle model to the vissim

Step 3-2 Set Distributions of 3D model in VISSIM
Select "Base Data" -> "Distributions" -> "2D/3D Model"

- In order to create the separated distribution group, follow the way below.

- In order to add your model to the existed Car distribution group, follow the way below.

Step 3-3 Set Vehicle Types in VISSIM
Select "Base Data" -> "Vehicle Types"

Add the vehicle type and change "Vehicle Model" in the vehicle type window.

Step 3-4 Set Vehicle Classes in VISSIM
Select "Base Data" -> "Vehicle Classes"

After creating the new vehicle class, change the vehicle type option to the VehType you create before.

The advantage of creating vehicle classes is that you can select a particular option on your model, as you can see the pictures below.

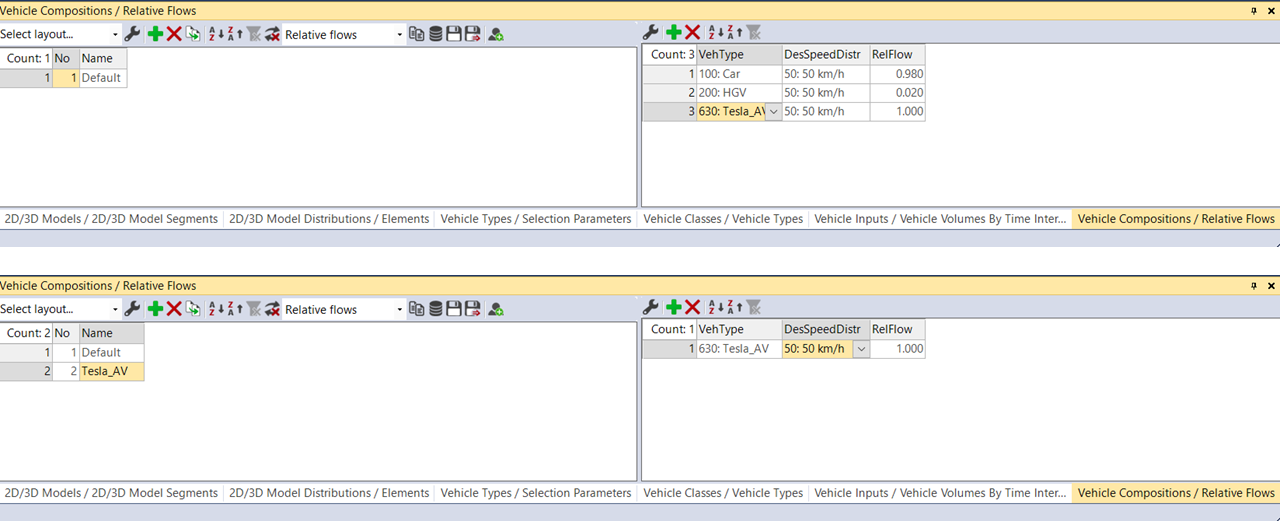
Step 4 Set Vehicle Composition in VISSIM
Select "Traffic" -> "Vehicle Compositions"

There are two ways to put your model into the simulation scene.
First, Add your model to the existed composition.
Second, Create a new vehicle composition and add your model into the composition.
So far, I prepared for sharing how to get your own 3D vehicle models in the vissim.
'Study > Vissim Advanced' 카테고리의 다른 글
| [VISSIM Advanced] Data Collection Points (0) | 2021.09.06 |
|---|---|
| [Vissim Advanced] Travel time (0) | 2021.08.31 |
| [Vissim Advanced] Node evaluation (2) | 2021.08.18 |
| [Vissim Advanced] Queue evaluation (0) | 2021.08.17 |
| [Vissim Advanced] Vissim Advanced Intro (0) | 2021.08.17 |


댓글